Warranty
Showcase cabinetry, crafted with precision by skilled artisans, adheres to stringent standards and specifications. We proudly warranty our products to original purchasers, guaranteeing freedom from defects in workmanship and material for one year. However, this limited warranty excludes instances of misuse, abuse, or neglect.
Please note that, like any solid wood product, the doors may undergo slight expansion or contraction due to humidity fluctuations. This natural process typically resolves within six to nine months. Should issues persist or for any other concerns, please contact Showcase Kitchens at (920) 465-8800 and inquire with our dedicated service department.
Caring for Your Custom Cabinets in Green Bay
Each tree is a product of nature. As such, there will be varying color and grain patterns. We make every effort to blend varying colors, grains, and textures of wood during the finishing process. These varying colors, grains and textures in wood are not defects but nature’s trademark.
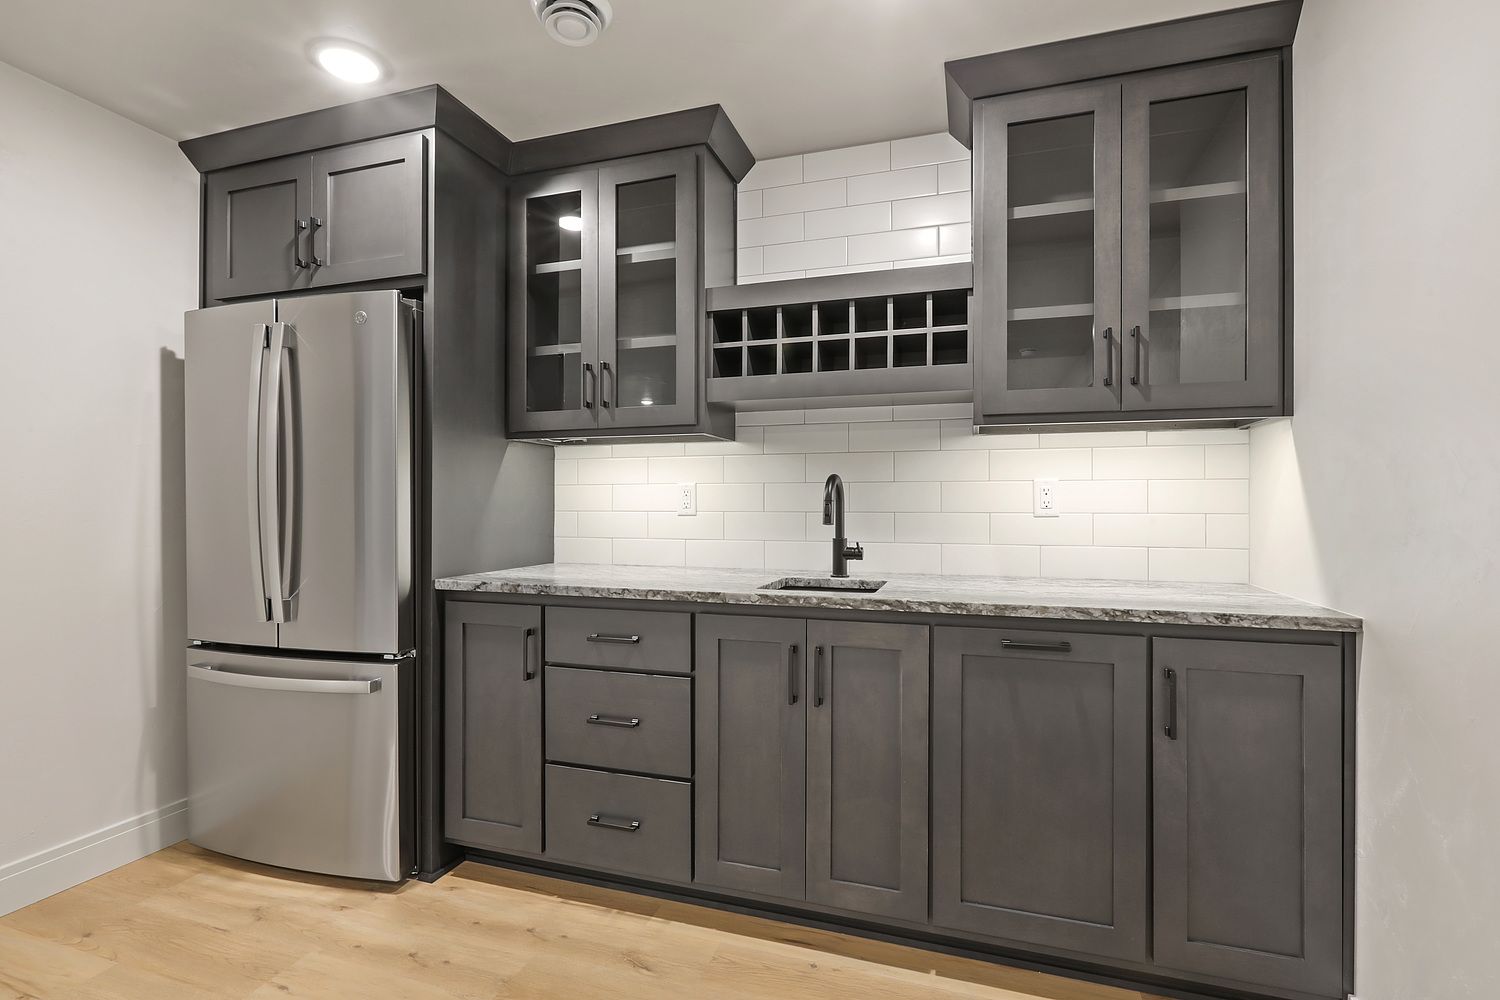
Showcase Kitchens in Green Bay, WI delivers a finish that brings out the full depth and beauty of natural woods. Proper care and maintenance will give you years of service and pride of ownership.
Maintenance Tips:
Following installation, gently wipe your cabinets with a damp, soft cloth, ensuring to eliminate any moisture. Always follow up with a dry, soft cloth to further remove any remaining moisture. Avoid using wax containing cleaners or spray wax, as these may damage the finish
For regular cleaning, use a damp, soft cloth followed by drying to maintain the integrity of the finish. Avoid harsh detergents, abrasive cleaners, or silicone-containing products, as these can deteriorate the finish over time. We suggest cleaning your cabinets approximately twice a year to keep them looking their best.
Certain areas in the kitchen, such as around the sink, range, oven, and dishwasher, are prone to moisture buildup. It's advisable to promptly dry off any moisture that accumulates in these areas to prevent potential damage.
Use & Care Guide
Basics to Adjusting a Fully Concealed Hinge
This hinge is adjustable in three directions. Start with patience and a Phillips screwdriver.
Use these two screws to adjust the height of the doors and/or align the tops of the doors.
Height Adjustment
This adjustment involves two screws, one to the top and one to the bottom of the clip. Loosen the screws slightly, and then lift or lower the door until it is in the position you want. Retighten the screws to secure the door.
Use this screw to bring the door into alignment with neighboring cabinet doors/drawers.
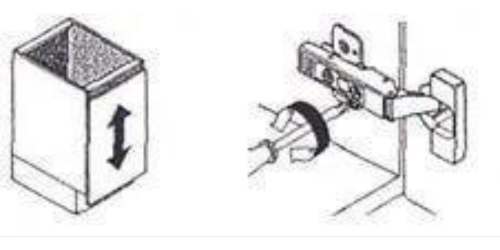
Depth Adjustment
Use this screw to adjust how far out or in the doors are in comparison to your cabinet and to the other cabinet doors and drawers surrounding it. Loosen the screw, and manually push or pull the door to adjust it. Retighten the screw when the door is in the position you want.

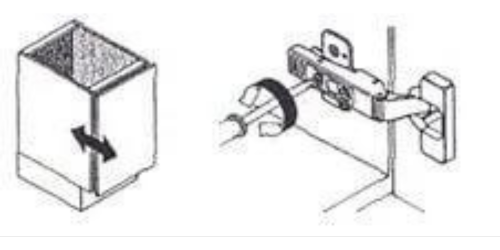
Use this screw to adjust the gap between doors, walls and other cabinets for parallel alignment.
Side-to-Side Adjustment
Using a Phillips-head screwdriver, turn the adjustment screw clockwise and counterclockwise to move the door – the direction of turn and its effect is dependent on which side of the door the hinge is attached.
On a door with a RIGHT-SIDE HINGE
- Turn the screw CLOCKWISE to move the door to the RIGHT
- Turn the screw COUNTERCLOCKWISE to move the door to the LEFT
On a door with a LEFT-SIDE HINGE:
- Turn the screw CLOCKWISE to move the door to the LEFT
- Turn the screw COUNTERCLOCKWISE to move the door to the RIGHT
Business Hours
- Monday
- -
- Tue - Thu
- -
- Friday
- -
- Sat - Sun
- Closed
© 2024 Showcase Kitchens & Renew-A-Kitchen. All rights reserved. Unauthorized duplication or distribution of any content on this website is strictly prohibited.